Recover Deleted Word Document in Windows 7

How to Get Back Deleted Word Document in Windows 7?
Sometimes some unfavorable situations like accidental deletion, formatting, corruptions, etc. make you lose the entire the Word documents on Windows 7 system. Do not worry, here is an excellent solution to recover deleted Word document in Windows 7 computer within a couple of mouse clicks. Prior file recovery let's see what causes deletion of Word files on Windows PC's.
Some reasons behind deletion of the Word document in Windows 7 PC:
- Accidental Deletion: While removing unwanted document files you may end up deleting essential Word documents. On the other hand, you might mistakenly apply "Shift + Delete" on the critical Word files. Tap here- www.officefilerecovery.com/accidentally-deleted.html to know recover accidentally deleted MS Word document in Windows 7 PC with great ease.
- Emptying Recycle Bin: The essential Word files from the Recycle Bin get permanently get deleted when you end up clicking "Empty Recycle Bin" option. Once after emptying the recycle bin folder, it is not directly possible to restore those files.
- Virus Attacks: Word documents stored on Windows 7 is prone to severe virus or malware attacks. This can occur whilst downloading or copying the virus-infected document file from the internet or other unreliable sources.
Whatsoever might be the cause behind deletion of the crucial Word document files, if you have maintained a proper backup of crucial documents then you can easily restore from the backup. But, at some of the undesirable conditions, you may fail to possess a proper backup of Word document file, in such situations, employ the Office File Recovery tool on Windows 7.
Undelete Word files from Windows 7
This software has the built-in scanning algorithm to perform rigorous scanning of Windows 7 to restore deleted .doc and .docx Word document file with ease. With the help of this immaculate tool, you can restore deleted document file or folder even after deleting the file by making use of the "Shift + Delete" key combination. This software has the ability to restore deleted Word document file on the hard drive and external drives. The Office File Recovery is a read-only tool that scans and extracts documents without altering any data (all the file attributes remain intact after recovery). Read more by following the link given here: www.officefilerecovery.com/word-file-recovery.html
The program also enables its user to recover Office files from My Document folder on Windows system. Moreover, you can utilize this recovery application to regain all formats of MS Office file formats (Word, PowerPoint, Outlook, Excel, Access, etc.). You can easily run the application on the latest versions like Windows 10, 8, Vista, XP, 2007, 2003, etc.
Steps to Recover Deleted Word Document in Windows 7:
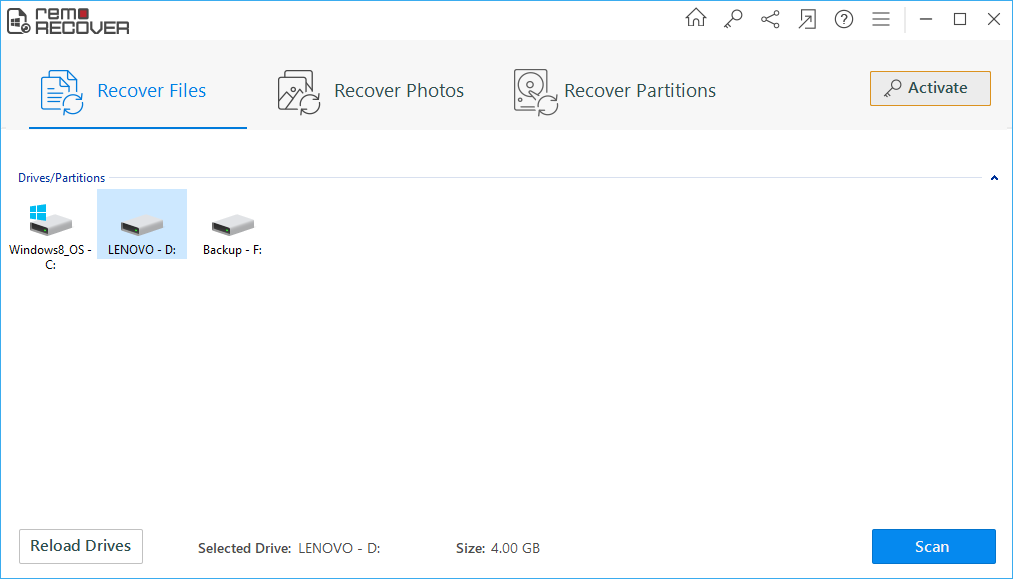
Step 1: Run the Office File Recovery app on your Windows 7 system. Choose Recover Files option on the main screen. Then select the logical drive that contained the deleted Word files. Click on Scan button to start.

Figure 1: Main Window
Step 2: The scanning process gets initiated in the next step.

Figure 2: Scanning for Files
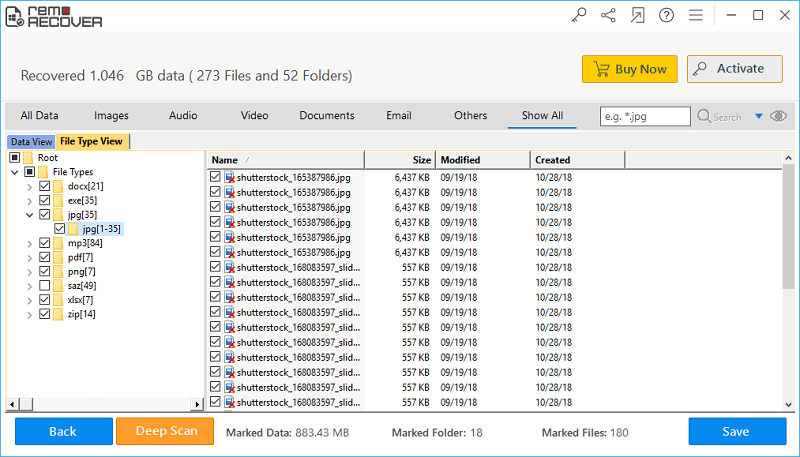
Step 3: Preview the restored files in File Type View and Data View panes. Mark the DOC and DOCX files that you wish to save.

Figure 3: Recovered Files
Step 4: Set a folder location to save the retrieved Word documents. Finally, click on the Save button.

Figure 4: Save Recovered Files