Office File Recovery

Restoration of Missing Office Files
Have you lost your precious MS Office files from the hard disk? Microsoft provided a wonderful MS Office application that comprises of many useful applications like MS Word document, PowerPoint Presentation, MS Excel, etc. Well, there are chances of losing those files due to virus attacks, accidental format of the drive, file system error, corrupt, etc. In case, if you have lost your precious Office files due to any reasons then you need the best recovery software to regain those files. Office File Recovery software one finest solution that is capable of rescuing lost MS Access files, DOC, DOCX, PPT, PPTX. PST, XSLX, XLS, etc. with irrespective of the cause for file loss. This program also restores MS Office files from different storage devices like USB drive, SSD, FireWire, Memory sticks, SSD, flash cards, external hard drive, etc.
Possible reasons behind loss of MS Office files
- User mistakes: Mistaken file deletion and inappropriate operations can make MS Office files go missing or inaccessible.
- File system error: A file system error due to the corruption of the file system due to virus attacks or accidental deletion of the file system can lead to loss of Office files stored on the disk.
- Interruption: While transferring MS Office files from PC to a USB pen drive and vice-versa if an interruption occurs like- sudden failure of power, canceled process or sudden ejection of the removable drive, etc.results in loss of files that were undergoing transfer. However, one can simply tap here https://www.officefilerecovery.com/word-document-after-power-outage.html to restore Word documents after a sudden power outage with ease.
- Inappropriate use of the device: Frequently connecting and ejecting the USB drive from PC which creates bad sectors on the USB drive resulting in the file system error and it makes your USB drive inaccessible which causes you to lose data stored on that drive.
You no longer have to worry about Office files lost due to any of the above-mentioned scenarios because you can easily retrieve those files using this highly-skilled tool. It’s a wonderful tool to the rescue deleted PST files of all popular versions of MS Outlook. Moreover, this tool supports the rescue of Office files on Windows XP, Windows Vista, Windows 7, Windows 8 and Windows 10. A demo version of this tool is freely available for you to check the efficiency of restoring missing Office files from the hard drive. If you are satisfied with the obtained results then buy the paid version software to save rescued files from the demo version. Click here to know more information about this tool.
Steps to restore MS Office files are:
Step 1: Launch the Office File Recovery tool on your PC. Select "Recover Files" option from the main screen as depicted in figure 1. Continue to choose the logical drive that is to be scanned for missing Office files. Hit on the Scan button to begin the recovery process.
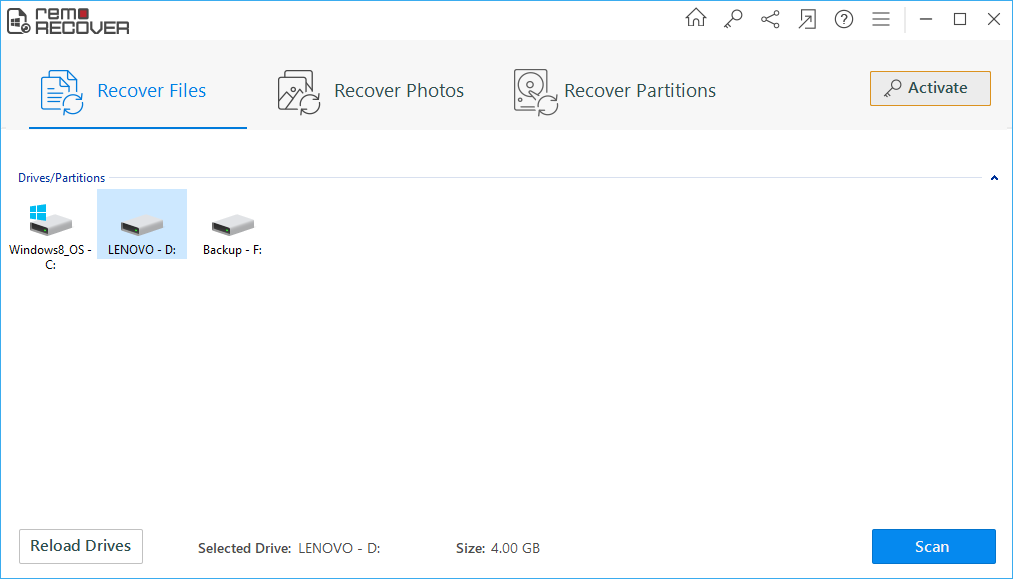
Figure 1: Main Window
Step 2: The program continues to scan the drive you selected.

Figure 2: Scanning for Files
Step 3: When the scanning is complete, the recovered files are listed in a new screen. Check for your files in File Type View and Data View. layouts.
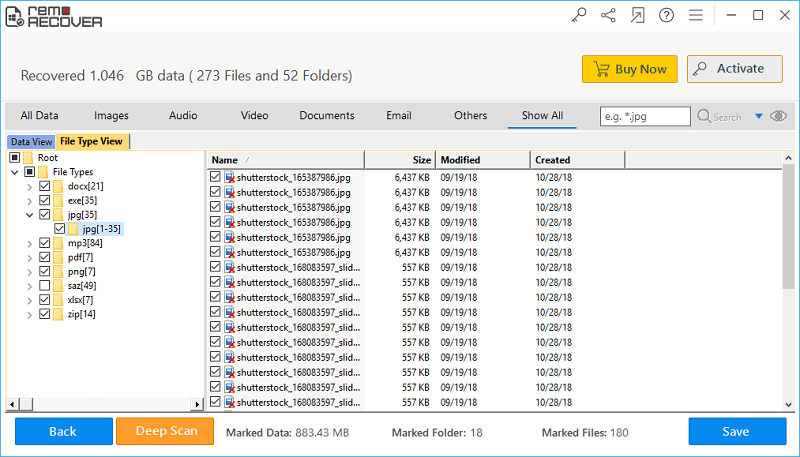
Figure 3: Recovered Files
Step 4: Preview the files and proceed to mark them for saving.

Figure 4: Preview
Step 5: Select an output folder location to save files and click on the Save button.

Figure 5: Save Recovered Files